

What are Solutions?
In the simplest terms, solutions act as containers facilitating the implementation of application life cycle management (ALM). These containers allow the storage and transportation of all components from one environment to another. It's a fundamental and standard practice for every Power Platform developer to incorporate the use of Solutions when working with their apps.
Note: Solutions in PowerApps are not a premium feature and do not require any premium licensing.
Working with Solutions:
When navigating directly to PowerApps in your tenant using make.powerapps.com , you can create apps, Dataverse tables, and other components independently. This often occurs in the default environment where everyone has access. However, to emphasize the importance of solutions, we create all these components in one place. This is essential when working in a development environment and wanting to transport everything created as a package to a production environment or a client's ecosystem.
In this article, we will delve into the concepts of solutions and learn how to create and export them from one environment to another.
1. Creating A Solution:
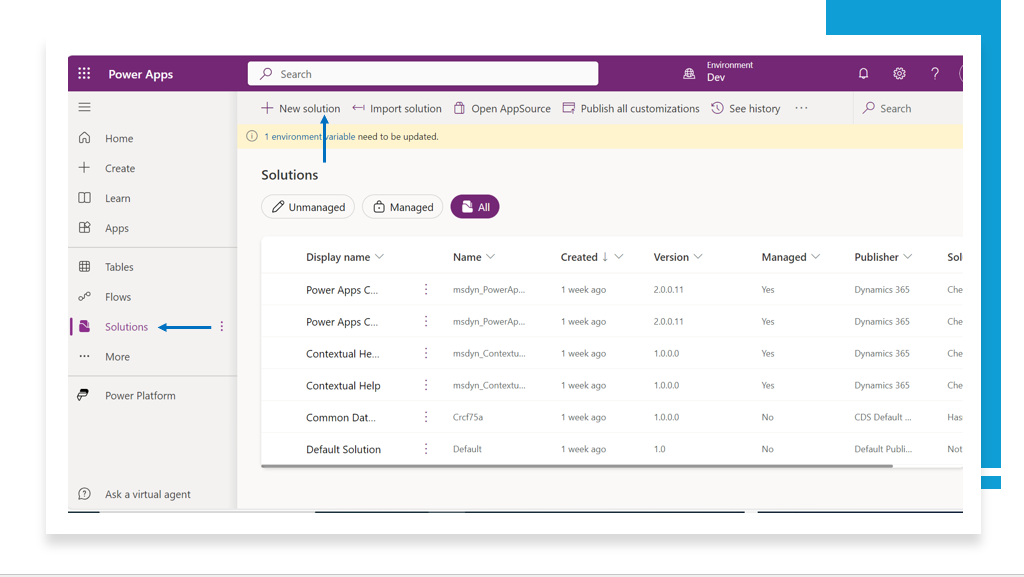
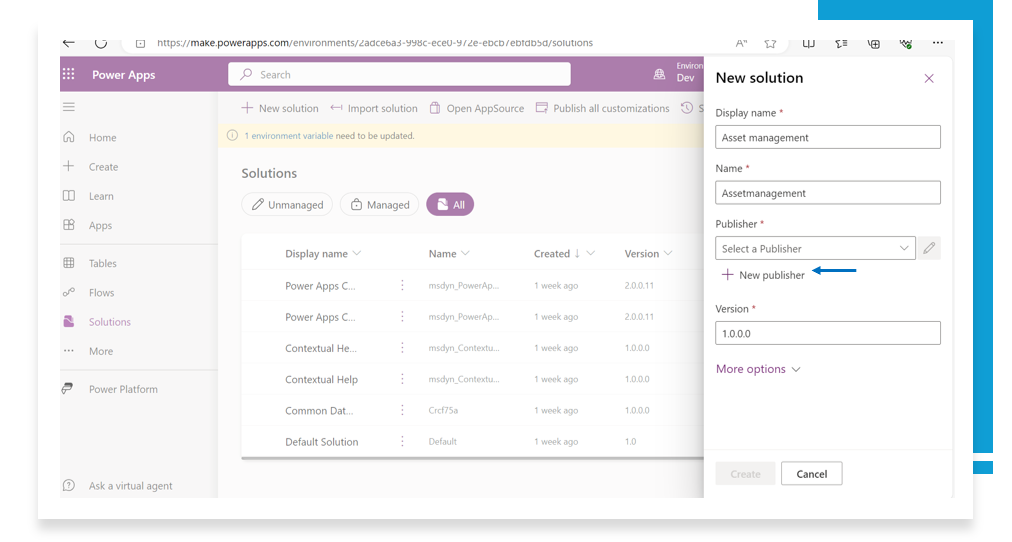
- Select "Solutions" and click on "Create new solution."
- Provide a name for the solution; for example, "Asset Management" for managing assets in an organization.
- Define a solution publisher, creating a new one to avoid naming collisions.
- Add the publisher to your solution, and proceed to create the solution, initially set as an unmanaged solution.
2. Managed and Unmanaged Solutions:
- A solution can be either managed or unmanaged.
- Unmanaged solutions are used in development environments for making changes to your application.
- Managed solutions are deployed to environments other than development for that solution.
Solution View 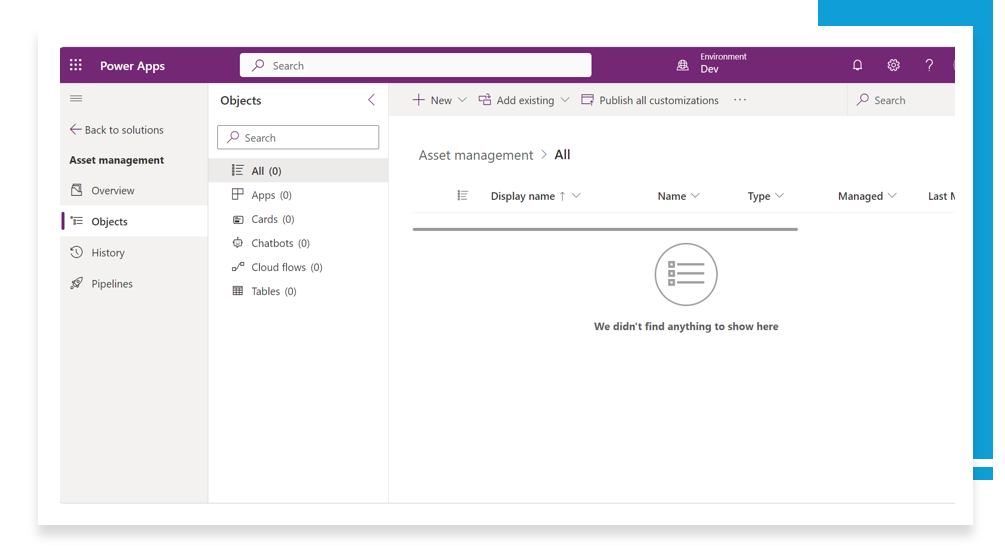
Panes Overview: The left navigation pane is divided into several areas:
Overview:
- Display name, name, created on date, version, managed or unmanaged, publisher, description, and patch status.
- Solution health information.
- Solution actions available on the command bar: export, clone, apply upgrade, and translations.
Objects:
- Tree view of all objects within the solution.
- Select an object from the list to view or edit it.
History:
- Displays solution operations completed, including imports, exports, or uninstalls.
- Shows solution version, publisher, type of operation, start and end time, and operation result status.
Tree View:
- In the Objects pane, the tree view lists objects and subcomponents.
- Browse and search for objects within the solution.
Other Features:
- Command Bar:
- Contextual command bar to perform actions on the solution, objects, or subcomponents.
- Objects List:
- Displays information and components for the selected object from the Objects pane.
- Add existing objects or subcomponents, create new ones for unmanaged solutions.
- Search:
- Use to filter the list of subcomponents for the currently selected object.
- Filter based on properties like Lookup data types or column requirements.
Solution Components 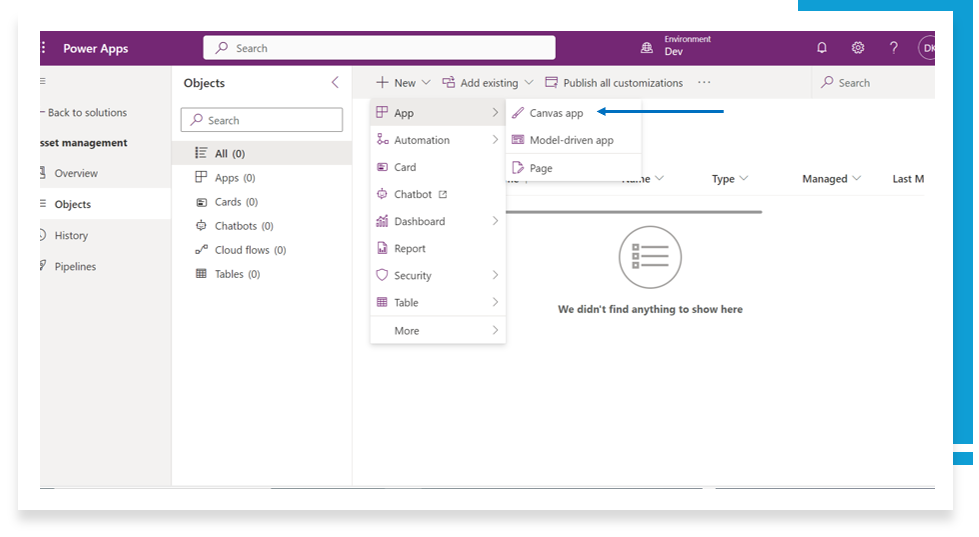
Apps
I'm swiftly incorporating a canvas app for managing assets. Despite the effectiveness of solutions with Dataverse tables, given their environment-based structure, I've opted to utilize the SharePoint list template for this asset management scenario.
Initiating the process, I add a canvas app to the solution specifically for my Asset Management application. As the goal is to seamlessly transition the app between different environments, I find it essential to dynamically store SharePoint site details through an environment variable. This ensures the app's adaptability and smooth relocation across various environments.
Environment Variables
Environment variables in Power Apps provide a feature enabling the storage and management of configuration settings, parameters, or values that may change between different environments or scenarios. Serving as placeholders for dynamic values, they prove particularly useful in the context of application lifecycle management (ALM) when transferring an application between Power Platform environments.
In this instance, we'll create two environment variables:
- SharePoint Site
- SharePoint List
Creating Environment Variables
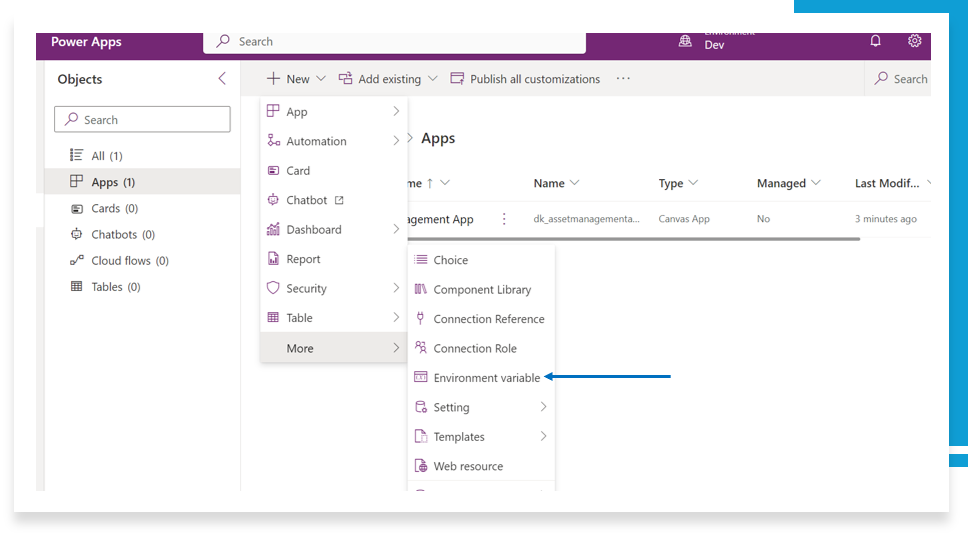
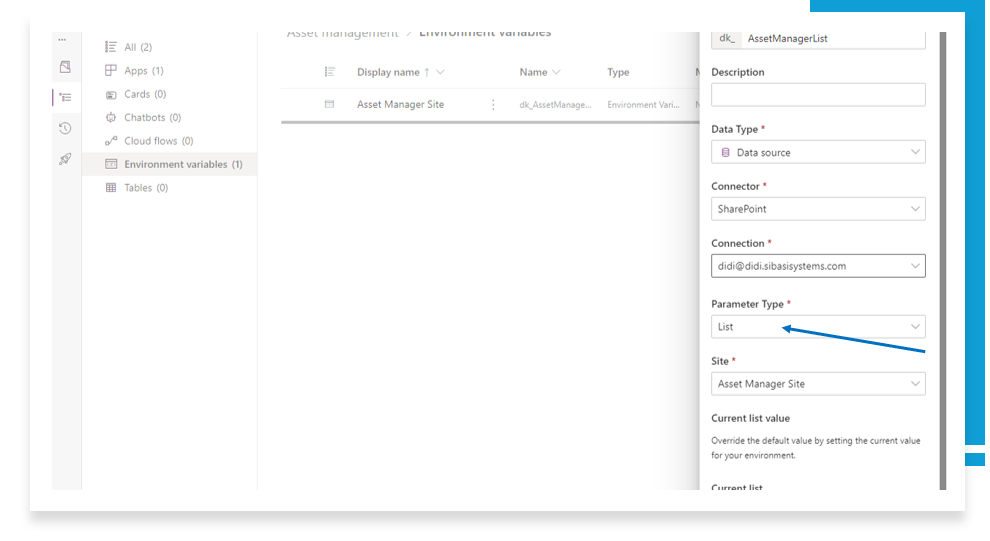
Returning to the solution source, select "New," then "More," and choose "Environment Variables." Proceed to create a new one by adding a Name, Description, and selecting "Data Source" as the Datatype. For the parameter type, choose "Site," and for the current Site Value, select your SharePoint site from the dropdown. Repeat this process for the SharePoint list parameter. 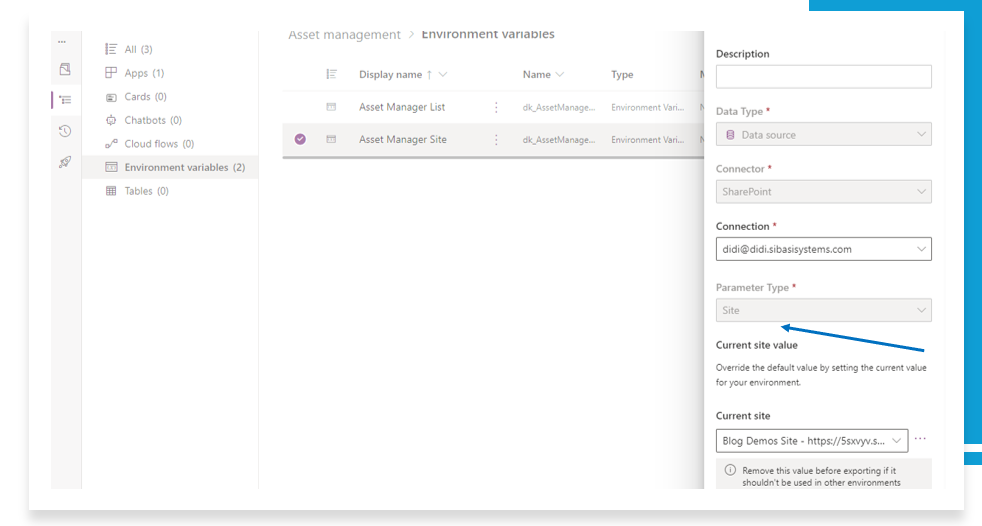
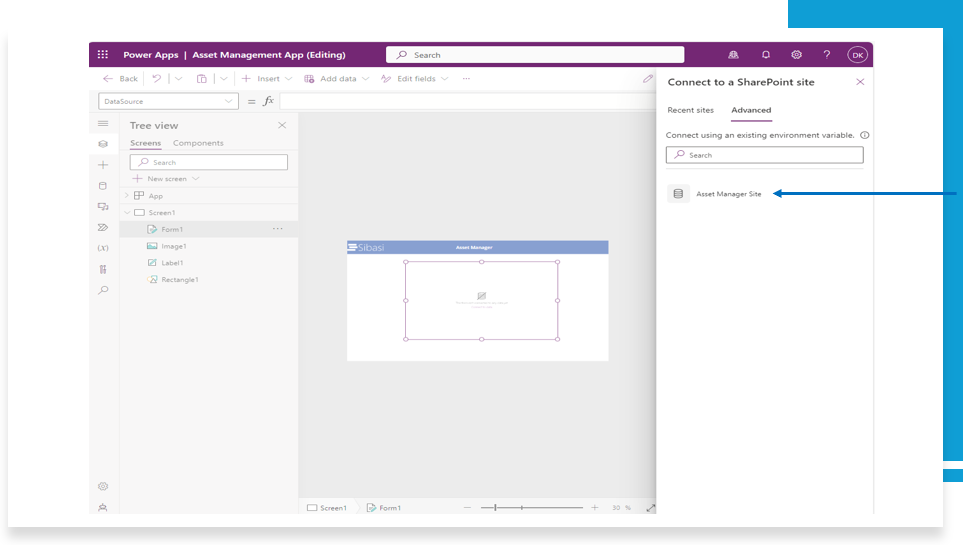
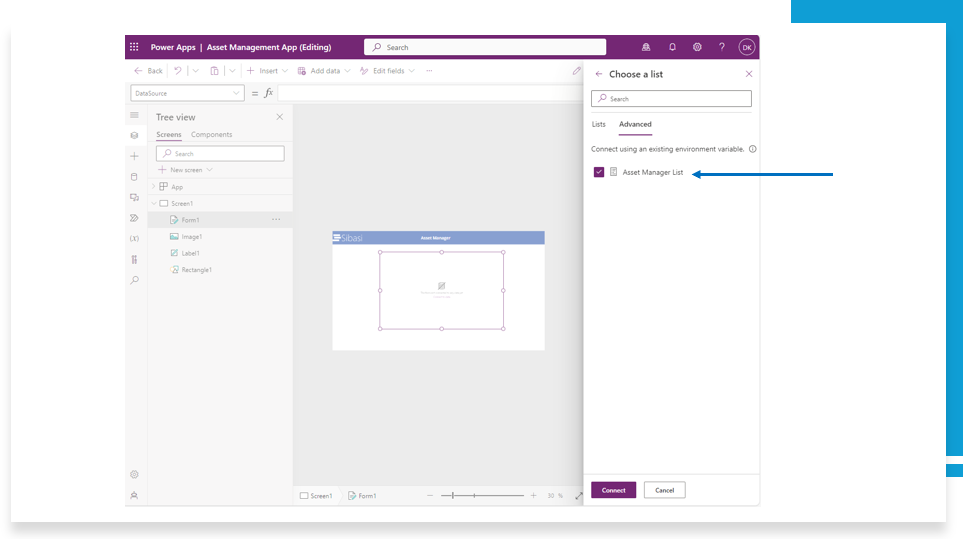
Back to the app, Add a form, and on the data source select SharePoint connector and click on the advanced to pick site from the environment variable we created, do the same for the list, select from the advanced option as shown in the figures below.
Exporting Solutions
For the sake of brevity in this article, let's quickly jump into exporting the solution. However, keep in mind that you can incorporate various components into your solution, including tables, different connections, automations, dashboards, reports, among other elements
Before exporting, navigate to your environment variables and remove the current values. This ensures that you'll be prompted to enter new values when importing the solution into another environment. 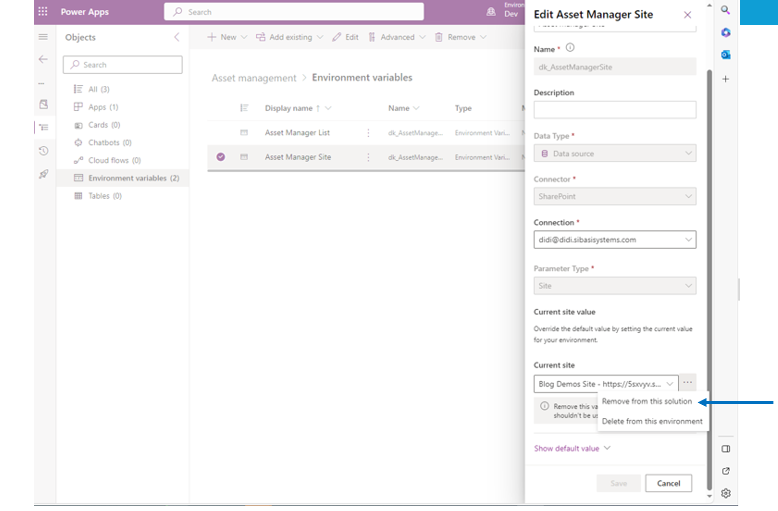
Publish all changes and run the solution checker to identify and resolve any issues. If exporting to another development environment, utilize the unmanaged solution. For production environments, a managed solution is appropriate, indicating that no further customizations can be made after deployment. 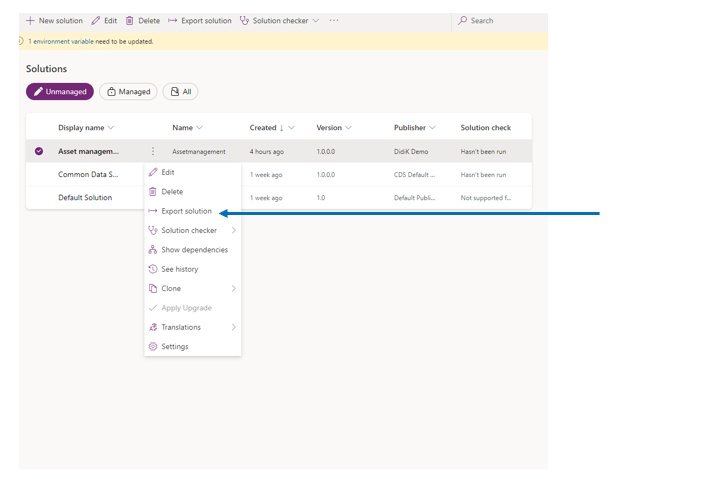
Importing Solutions
Upon successful export, download the solution packager. Locate the target environment and select the "Import" option. 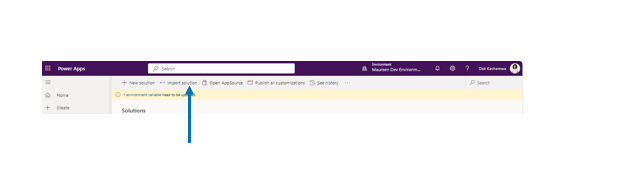
During the import process, ensure to recreate any variables you had in your environment. In our case, we had a SharePoint site and list. Make sure they are set to be updated with the values from the environment variables you had preset. 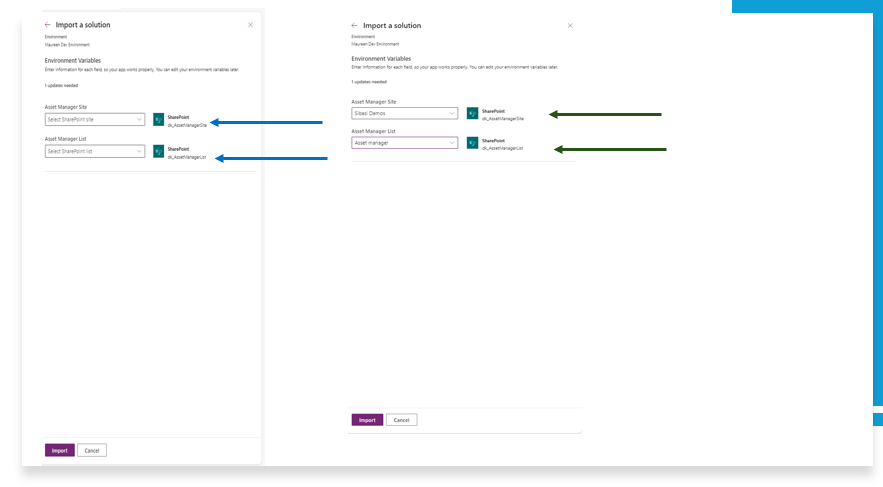
On a successful import, you'll see the same solution view, and the sample app we created can be accessed without any breakage. 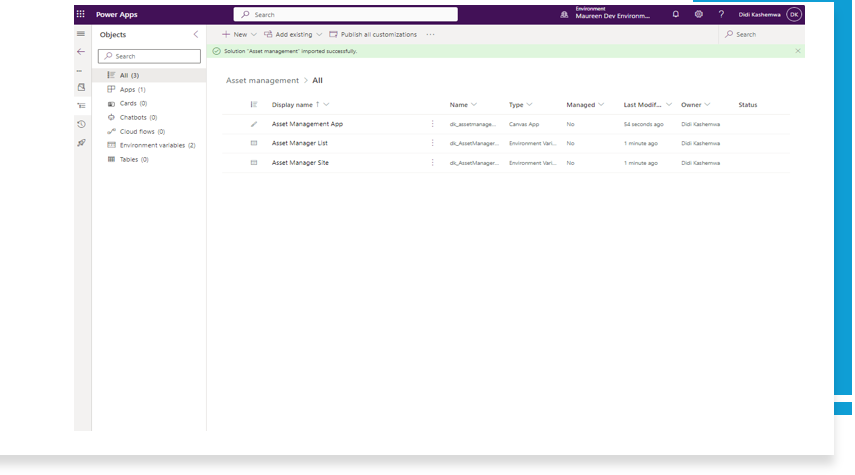
Voila! This concludes our solutions overview in PowerApps. As always, this is just the tip of the iceberg. Feel free to reach out if you'd like intensive training on working with solutions or need a solution implemented by sending us an email at [email protected].


