
In today’s fast-paced digital landscape, businesses and organizations require efficient, automated solutions to streamline document generation processes. Microsoft Power Automate provides a powerful and seamless way to automate the creation of documents by integrating Microsoft Word with structured data sources like SharePoint and Dataverse. This automation eliminates the need for manual data entry, ensuring consistency, accuracy, and time efficiency—key factors in optimizing business workflows.
Traditionally, generating Word documents involved time-consuming manual input or built-in Dynamics 365 features, which often came with limitations in flexibility and customization. However, with Power Automate, users can dynamically populate Word templates using real-time data from SharePoint lists or Dataverse tables. This enables the automated creation of reports, contracts, invoices, employee records, and other structured documents without human intervention.
This guide will walk you through a step-by-step approach to setting up a dynamic Word template, defining placeholders for automated content population, and configuring a Power Automate flow to fetch data from SharePoint or Dataverse. Implementing this method can significantly enhance workflow efficiency, reduce errors, and automate repetitive documentation tasks, ensuring a seamless, scalable solution for your organization’s document management needs.
Getting Started: Preparation
Before diving into the process, ensure the Developer tab is enabled in Microsoft Word. This step is essential for inserting content controls that will dynamically fetch data.
Step-by-Step Guide
Step 1: Create Your Word Document
Begin by creating a new Word document and formatting it according to your needs. For instance, set up a table to organize contact information.
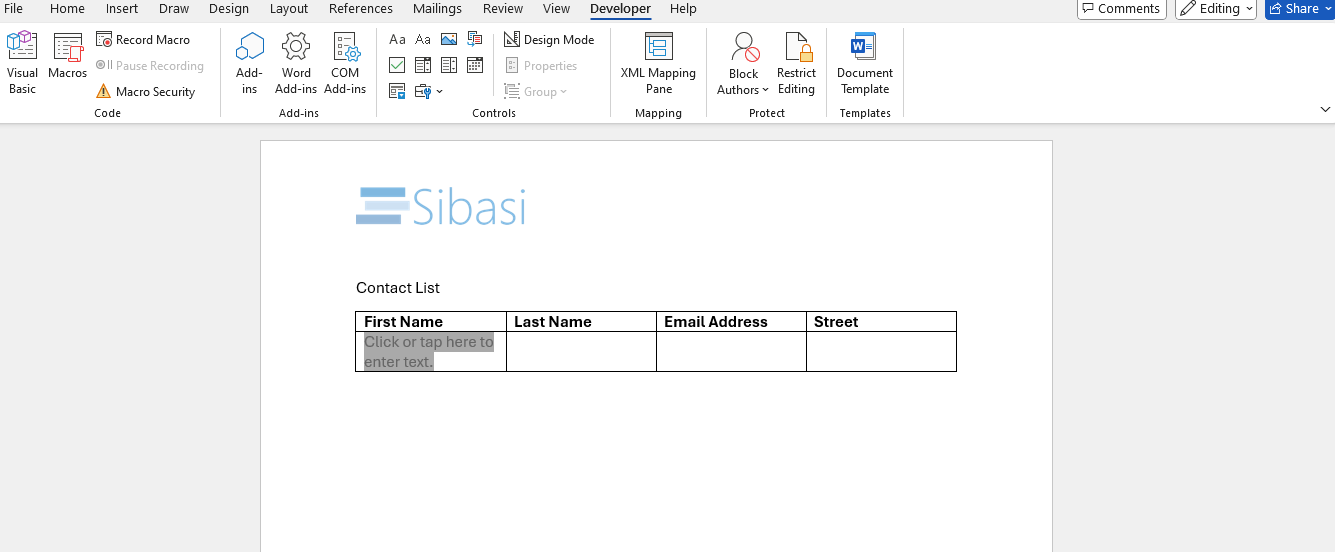
Enable the Developer Tab in Word
- Open Word > File > Options > Customize Ribbon
- Check "Developer" under Main Tabs
- Click OK
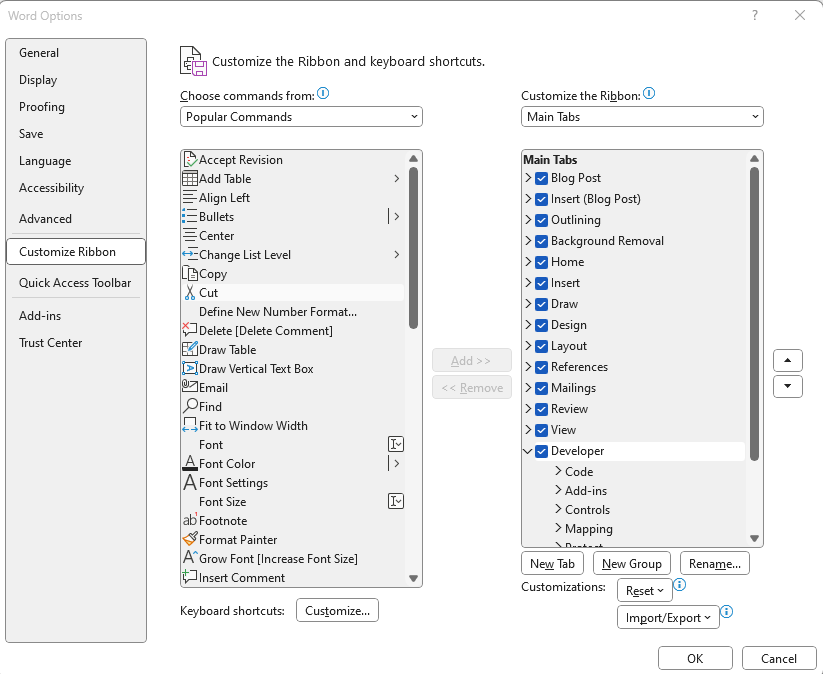
Note: The Developer tab is only available in the desktop version of Microsoft Word and is not available in Microsoft Word Online.
Create Your Word Document
Start a new Word document and format as required. In this example, we’re creating a simple table of contact information:
- Open a new document
- Insert a table for structured data
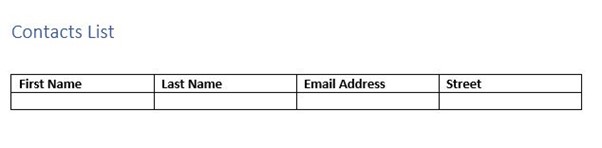
We will be using repeating rows to populate the table within the document, so we only need to create one blank row for now
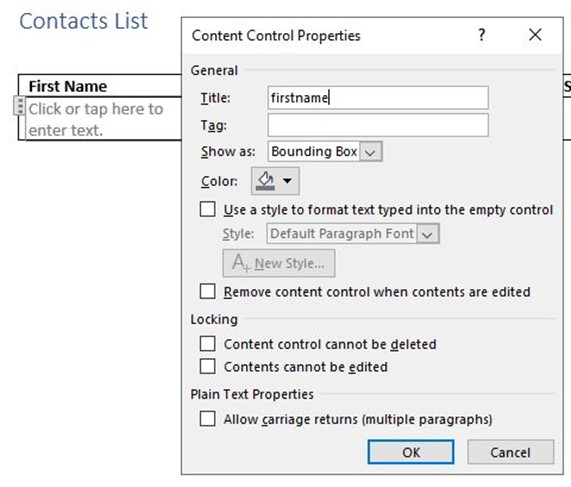
Insert Placeholder References
For each field you want to populate, you will need to add a placeholder reference via the Developer tab
- Click the Developer tab
- Select Plain Text Content Control
- Click Properties to name the placeholder
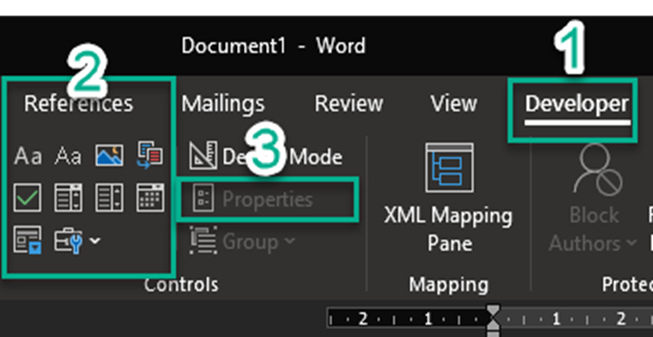
Under Controls (2 in the screenshot), you can see the available types (in most cases, you will want to use the Plain Text Content Control). Click on the required type to insert it into your table. Once entered, select it in your document and click Properties (3 in the screenshot)
Add a Repeating Row
Once all your fields are in place and with their titles set, you will need to select the whole row and add a Repeating Section Content Control, as seen below:
- Select a row in the table
- Click Repeating Section Content Control
Upload the Word Document
Now that the Word document is ready, we need to upload it so that it can be accessed by Power Automate. The simplest place for this would be OneDrive for Business, but SharePoint is another straightforward option too.
- Go to OneDrive for Business or SharePoint
- Click Upload and select the file
Step 2: Create a Power Automate Flow
We are now ready to create the flow to populate your template with data from Dynamics 365. Head over to make.powerapps.com to begin creating your flow, either from the Flows option in the menu or creating the Flow from within a Solution.
Create a Power Automate Flow
- Go to Power Automate
- Click Create > New Flow
- Choose Manually Trigger a Flow or an Automated Trigger
Fetch Data from SharePoint or Dataverse
- Add List Records action
- Select the relevant table (e.g., Contacts)
Initialize and Append to an Array
- Add Initialize Variable (Array type)
- Use Append to Array Variable to structure fetched data
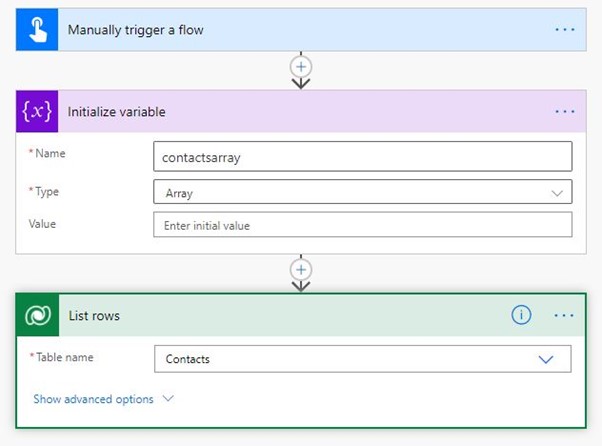
The key part to note is the initialization of an empty array that we will later be populating with Dynamics data.
Next, add an Append to Array Variable action, select your array variable initialized earlier and enter your text as below:
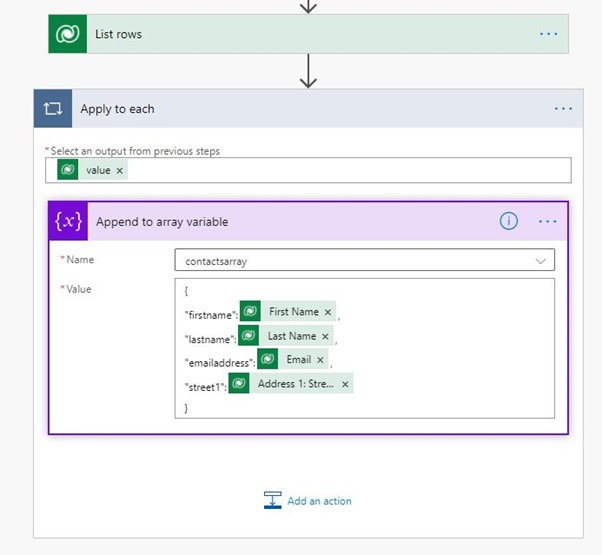
You will note that as soon as you add the first field (First Name in our example), an Apply To Each loop is automatically created for you; this enables your Flow to automatically loop through all of the records found in your List Records action. Ensure that ‘Value’ text is entered carefully in the same format as above or the editor will present you with an error.
Step 3: Populate and Generate the Word Document
Populate the Word Document
Now that we have prepared our data, we are now ready to populate our uploaded Word Document. When you add a Populate a Microsoft Word Template action, you will be prompted to browse for the location of your file and once selected, the references you added earlier will automatically be displayed:
- Add Populate a Microsoft Word Template action
- Select the uploaded Word template
- Map placeholders to fetched data
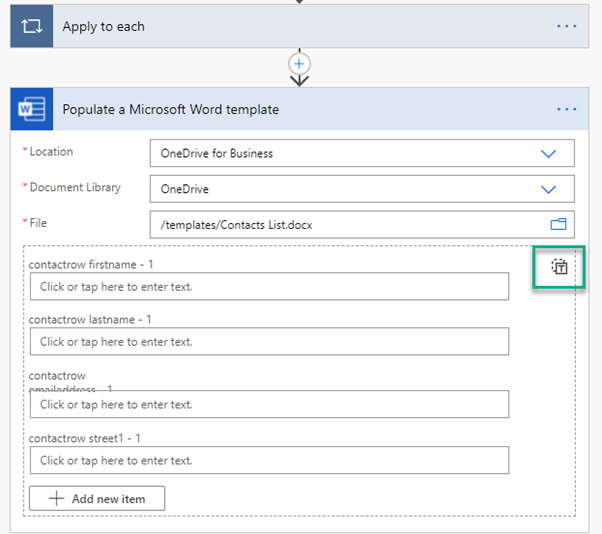
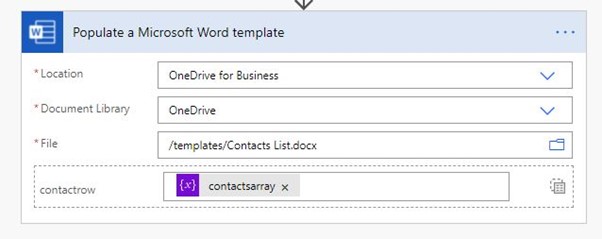
Although each individual reference is displayed, by clicking the Switch To Input Entire Array button, we can populate the whole row in one go using our array variable:
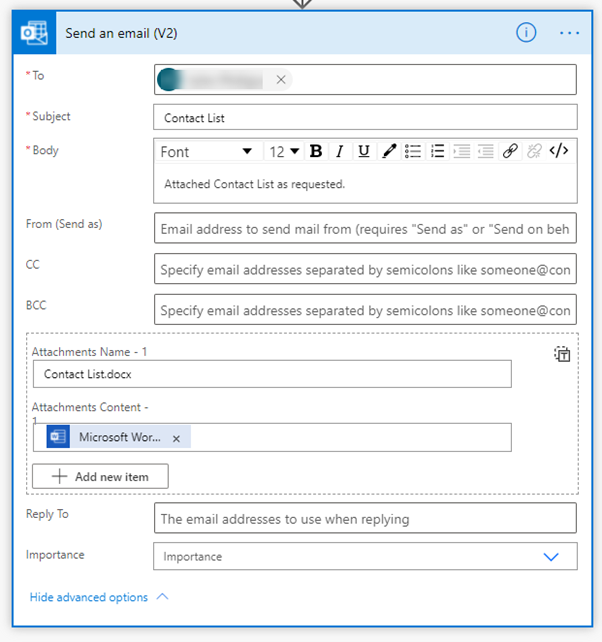
Generate and Send the Document
With the Word document now containing data, it’s ready to be used; in our case, we are just sending a simple email with the Word file as an attachment:
- Add Send Email (Outlook) action
- Attach the populated document