🧭 Step 1: Navigate to General Ledger Setup
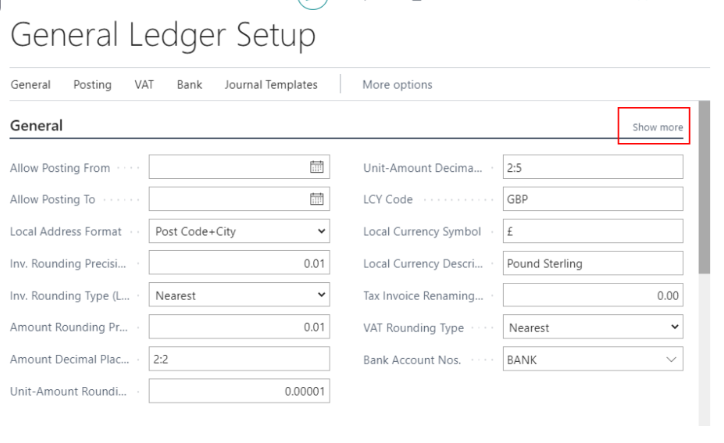
To get started, you need to access the General Ledger Setup window

Use the 🔍 Tell Me feature (ALT+Q or the magnifying glass icon at the top) and type "General Ledger Setup". Select it from the dropdown.
⚙️ Step 2: Locate the “Show Debit and Credit” Option
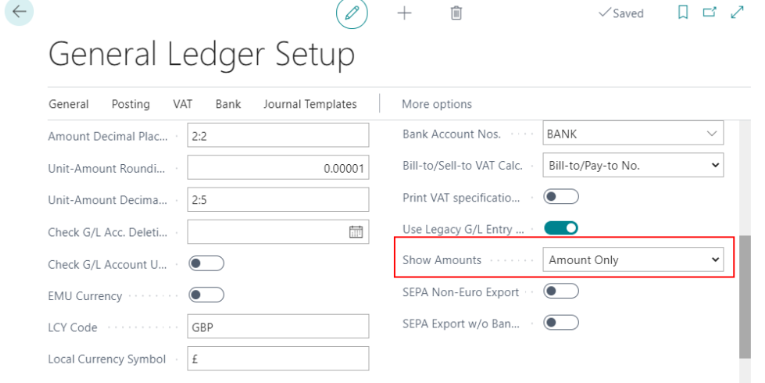
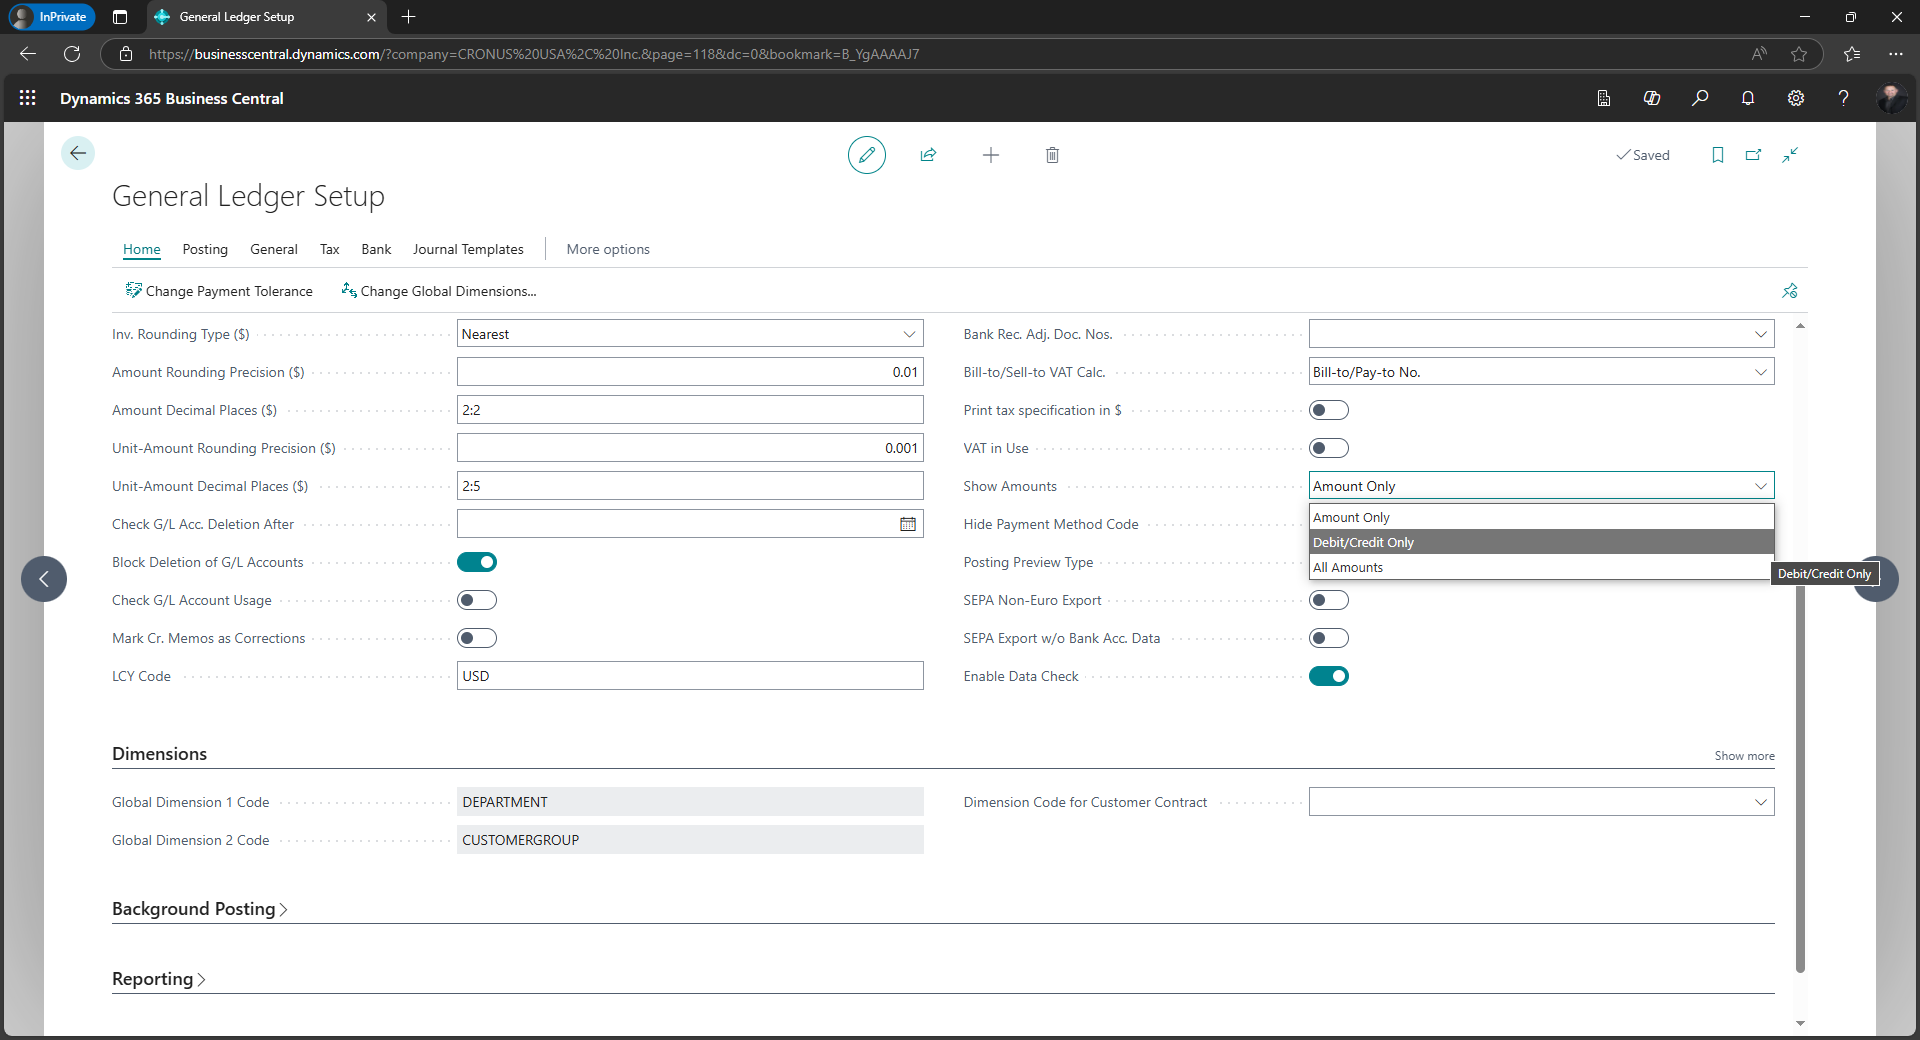
Once inside the General Ledger Setup page, scroll down or use the tab navigation to find the "Show Amounts" the default option is always amount only.

Click on the dropdown, and change to Debit/Credit Only

📊 Step 3: Save and Experience the Difference
After checking the box, close the setup. The change is instant! Now, go to:
-
General Ledger Entries
-
Chart of Accounts
-
Trial Balance Reports
You'll see separate columns for Debits and Credits.

This visualization helps finance teams better understand the flow of transactions and improves auditing and reconciliation processes.
✅ Why Use “Show Debit and Credit”?
🔹 Improved Clarity: For accountants and auditors, seeing separate debit and credit lines makes reviewing entries faster and more intuitive.
🔹 Compliance: Many financial reporting standards require this type of display for audit trails.
🔹 Ease of Reconciliation: Spotting imbalances becomes a breeze.
🔧 Bonus Tip: Use Filters and Personalization
You can further enhance the view using filters, personalization's, and saved views to tailor your ledger screens. For example:
-
Filter only Credit entries > 10,000
-
Personalize the column order for better workflow
📝 Wrapping Up
Enabling “Show Debit and Credit” in Business Central is a small switch with a big impact. It’s especially useful for finance professionals who prefer traditional accounting views and want quick clarity on every transaction.
Whether you're a CFO, accountant, or Business Central consultant, this setting adds value with minimal effort.


