In various organizational contexts, maintaining a consistent and well-structured document storage system is essential. Whether it's for employee onboarding, project management, or any other recurring task, manually creating nested folders in SharePoint can be time-consuming and error prone. This blog will explore how to automate the creation of nested folder structures in SharePoint using Power Automate, ensuring efficiency and consistency.
The Need for Structured Folder Systems
Organizations across different sectors often require a standardized way of organizing documents. This could be for:
- Employee onboarding
- Project documentation
- Client files
- Compliance records
Creating these folder structures manually can be repetitive and inefficient. Automation offers a solution by ensuring consistency and saving valuable time.
Example Scenario: Employee Onboarding
Let's consider the example of onboarding new employees. Each new hire needs a specific folder structure to store various documents. The required structure might look like this:
Employee Name├── Education│ ├── College│ │ └── Transcripts│ └── University│ └── Degree Certificate├── Employment Contract│ ├── Signed Proposal│ ├── Letter of Good Conduct│ └── Work Certificates
Creating this structure manually for each new employee can quickly become cumbersome. Automating this process ensures each new hire's documents are organized consistently.
Prerequisites
Before automating folder creation, ensure you have:
- Access to SharePoint.
- A Power Automate account.
- Necessary permissions to create flows and access SharePoint sites.
Step-by-Step Guide to Automate Folder Creation
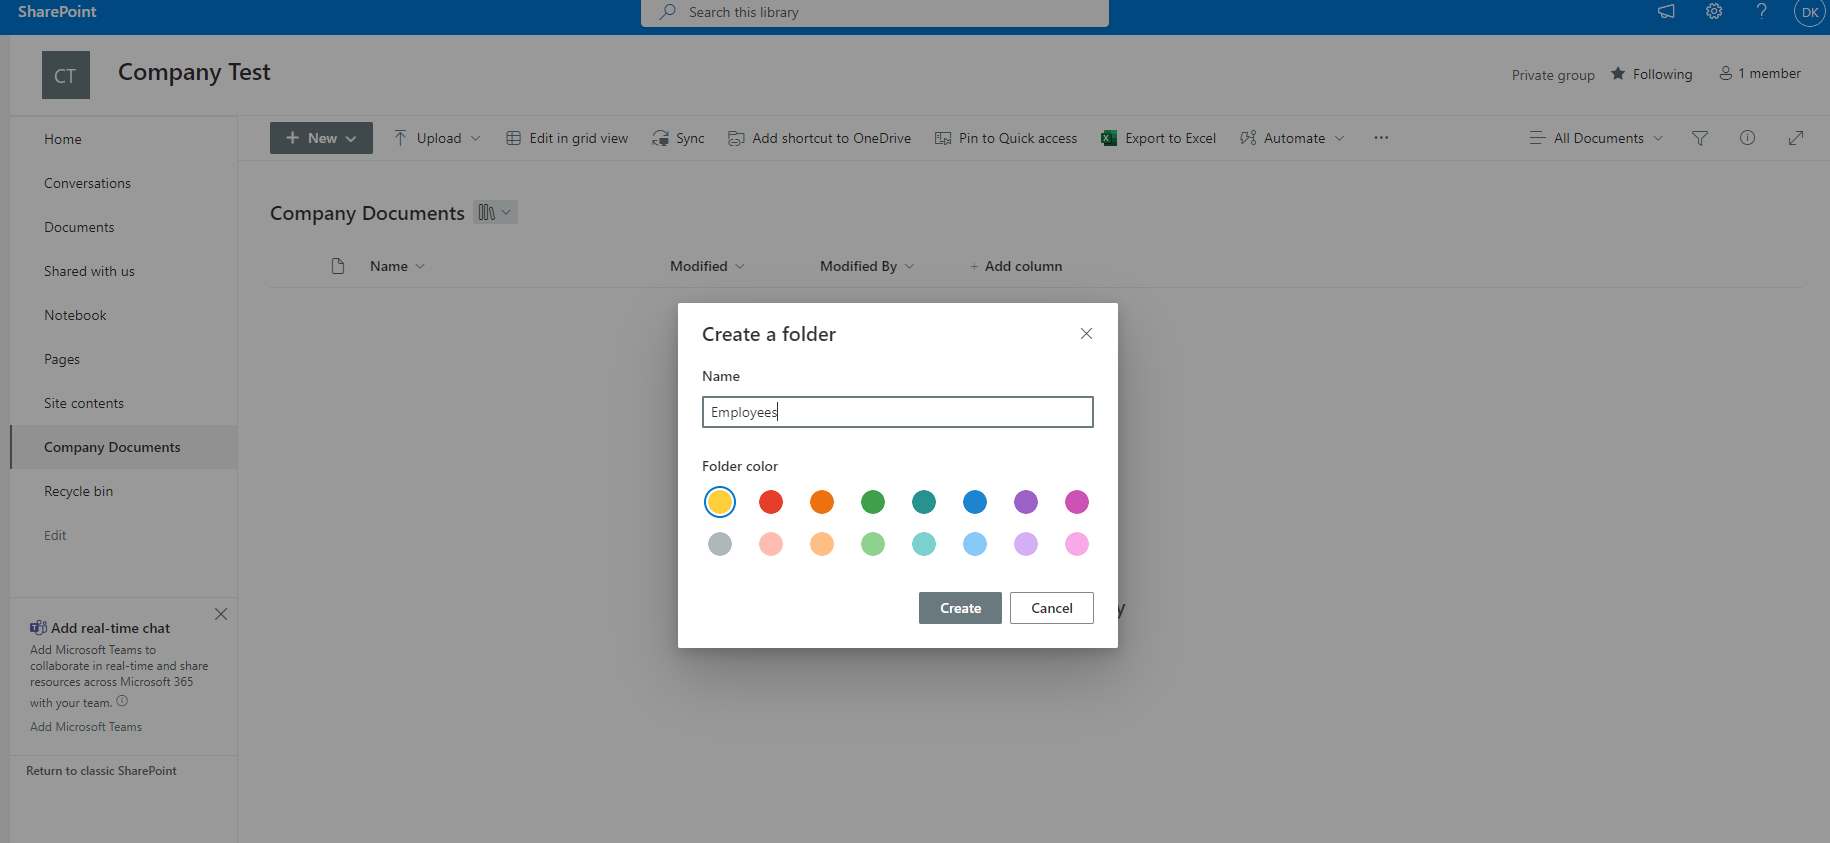
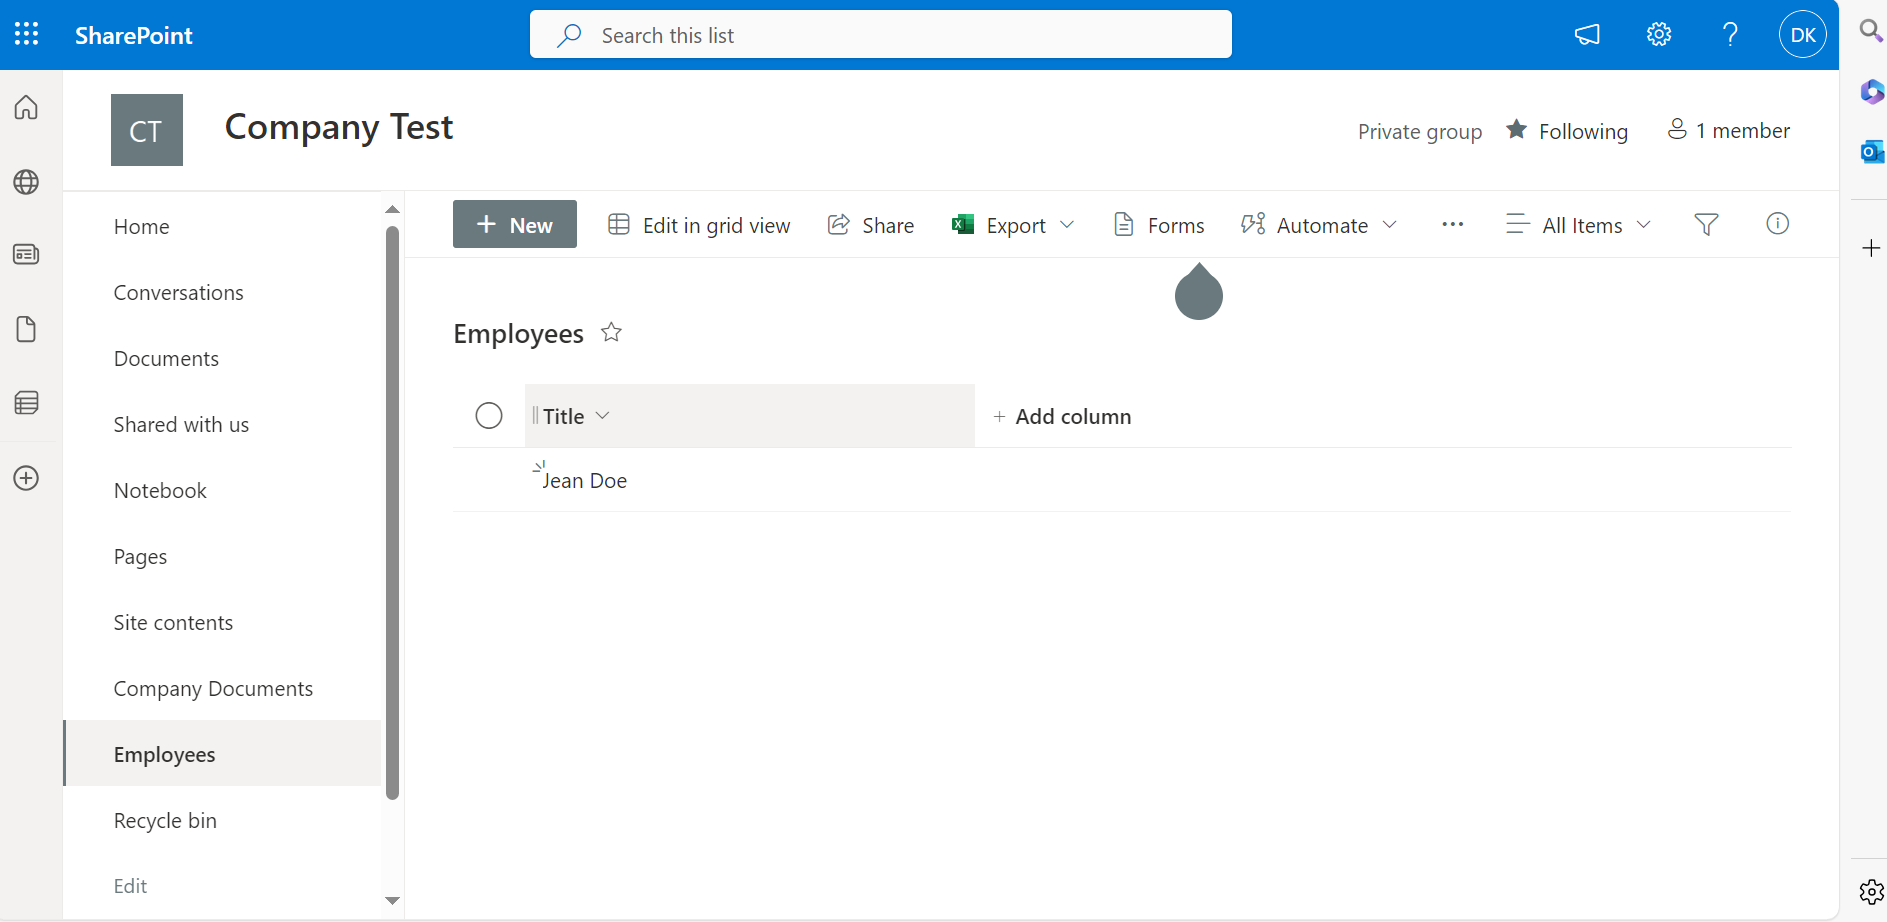
Step 1: Setting Up SharePoint
- Create the Main Folder:
- Navigate to your SharePoint site.
- Create a document library (if not already present) where the folders will be stored.
- Example path: Company Documents/Employees/.
- Define the Folder Structure:
- Identify the main folder and its nested subfolders. For example, for employee onboarding, the structure mentioned above.
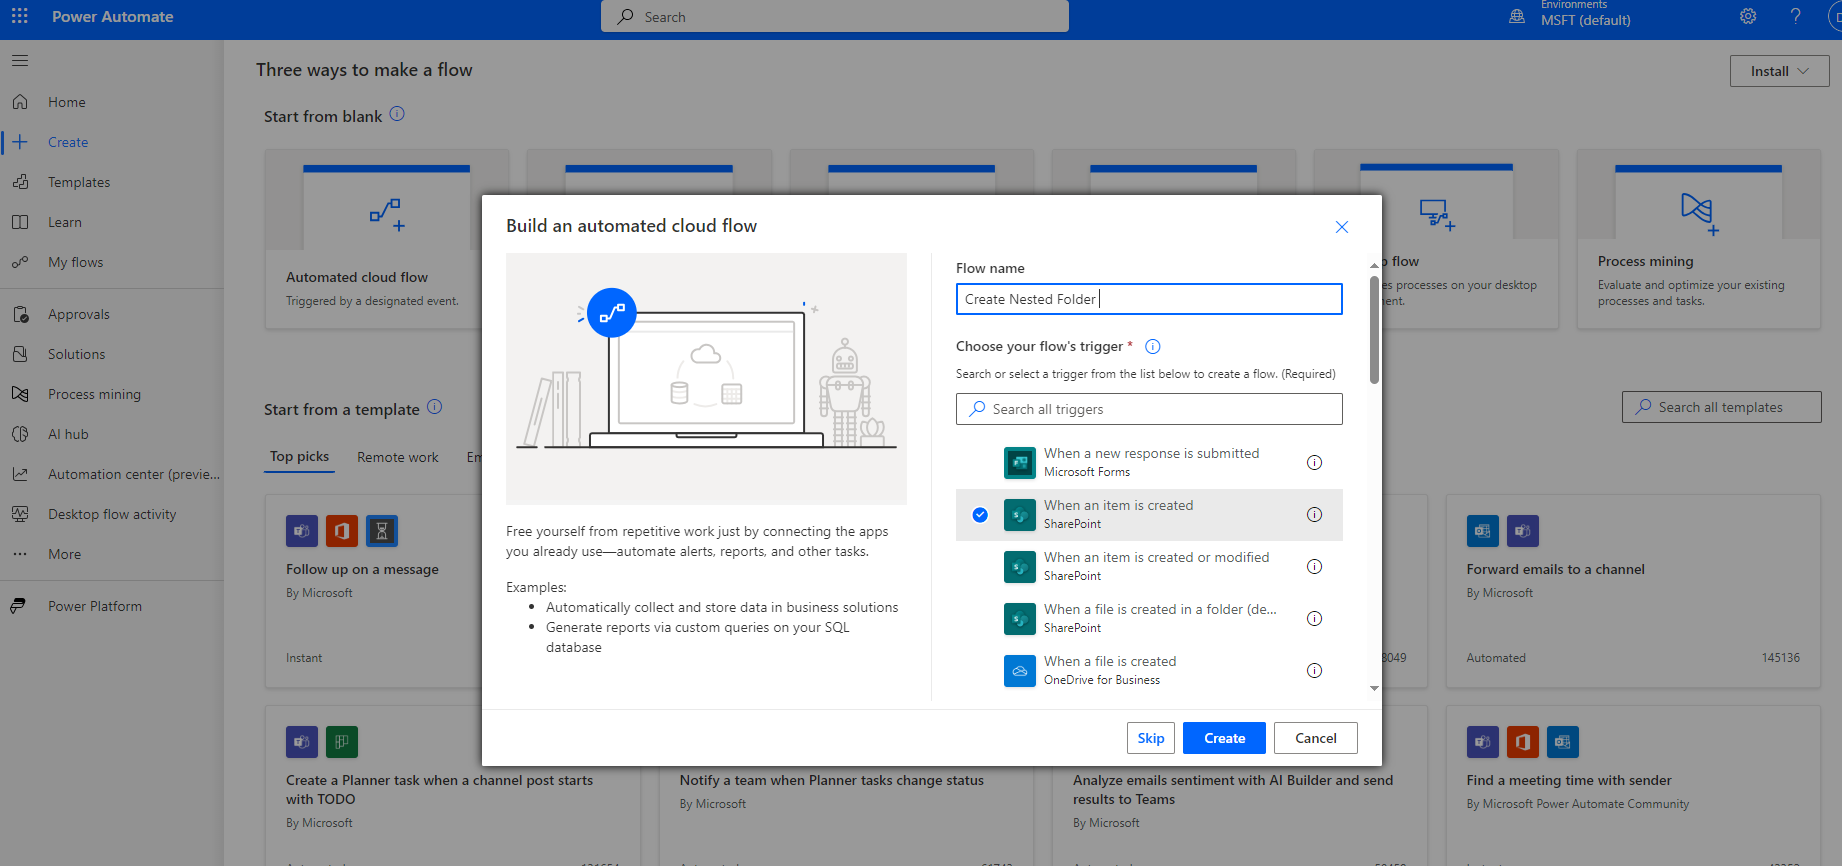
Step 2: Create a Power Automate Flow
- Log into Power Automate:
- Go to Power Automate.
- Create a New Flow:
- Click on "Create" > "Automated Flow".
- Name your flow (e.g., "Create Nested Folder Structure").
- Select the trigger: "When an item is created" in SharePoint.
- Configure the Trigger:
- Set the site address and list name where new details (e.g., Employees) are added.
- Initialize Variables:
- Add an action "Initialize variable" for storing the main folder name.
- Set the name (e.g., FolderName), type (String), and value to the dynamic content representing the main folder name from the trigger.
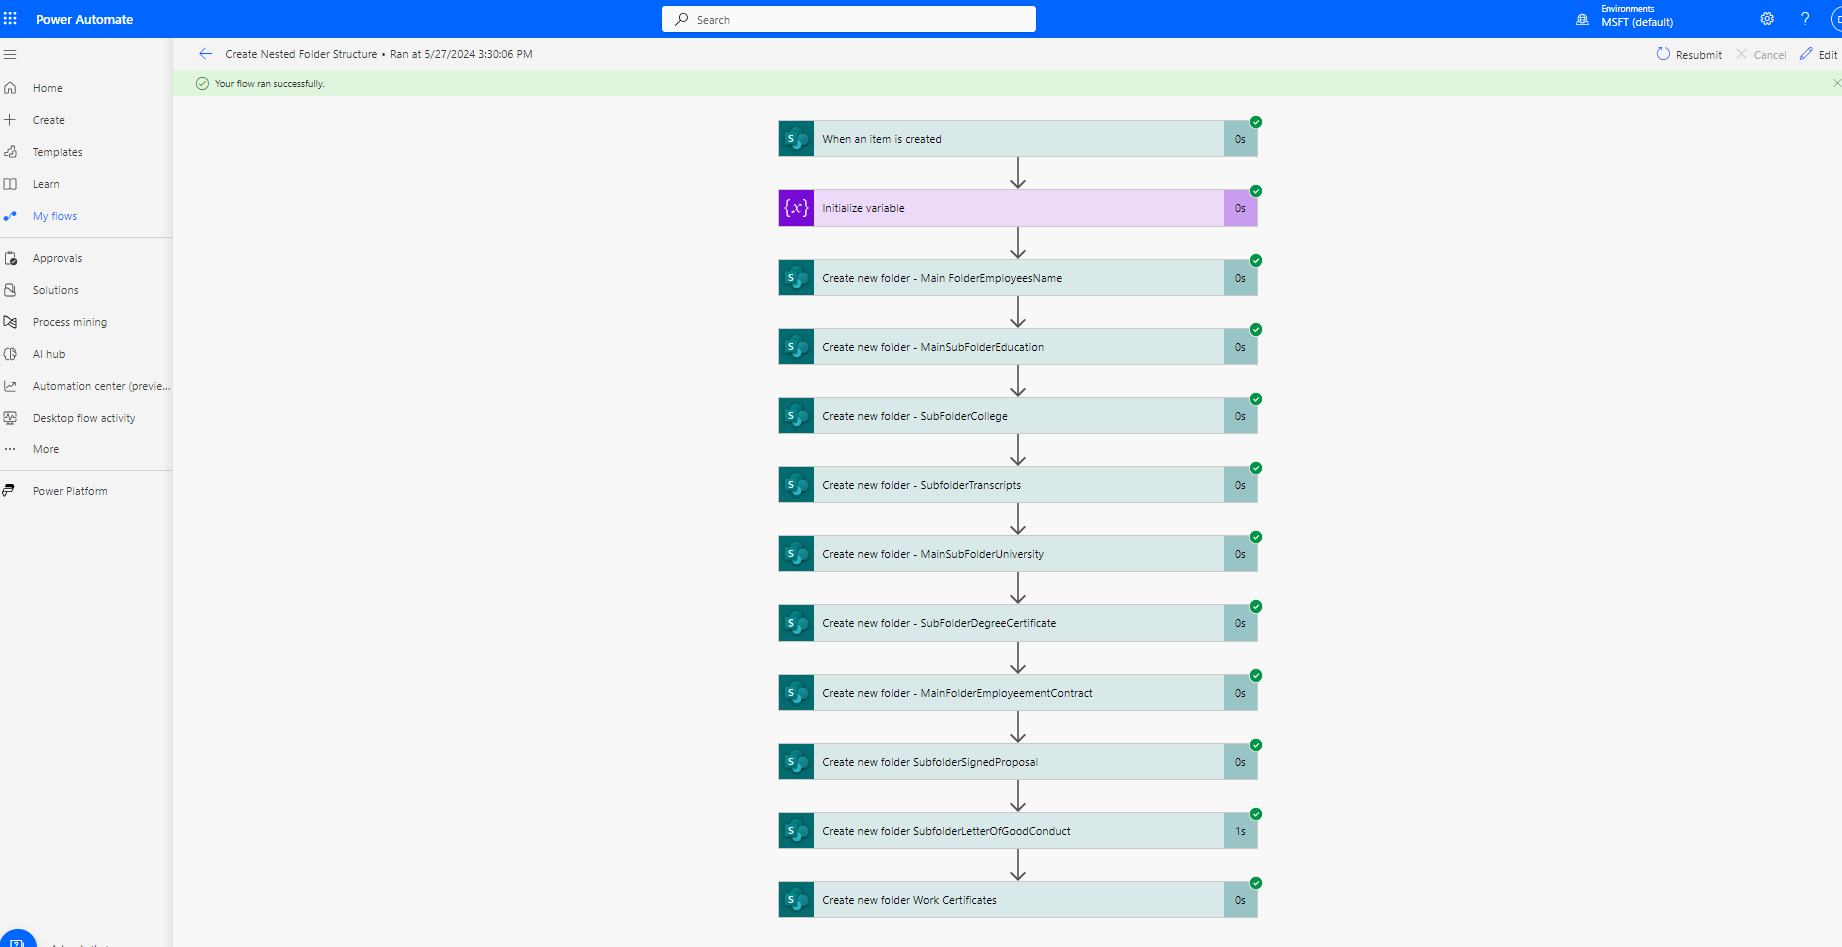
- Create Folders:
- Add an action "Create new folder" under SharePoint for each folder in the structure.
- Use the following format for folder paths:
- MainFolder/<FolderName>
- MainFolder/<FolderName>/SubFolder1
- MainFolder/<FolderName>/SubFolder1/NestedSubFolder
- Continue this pattern for all required subfolders.

- Save and Test Your Flow:
-
Save your flow and test it by creating a new item in the SharePoint list.
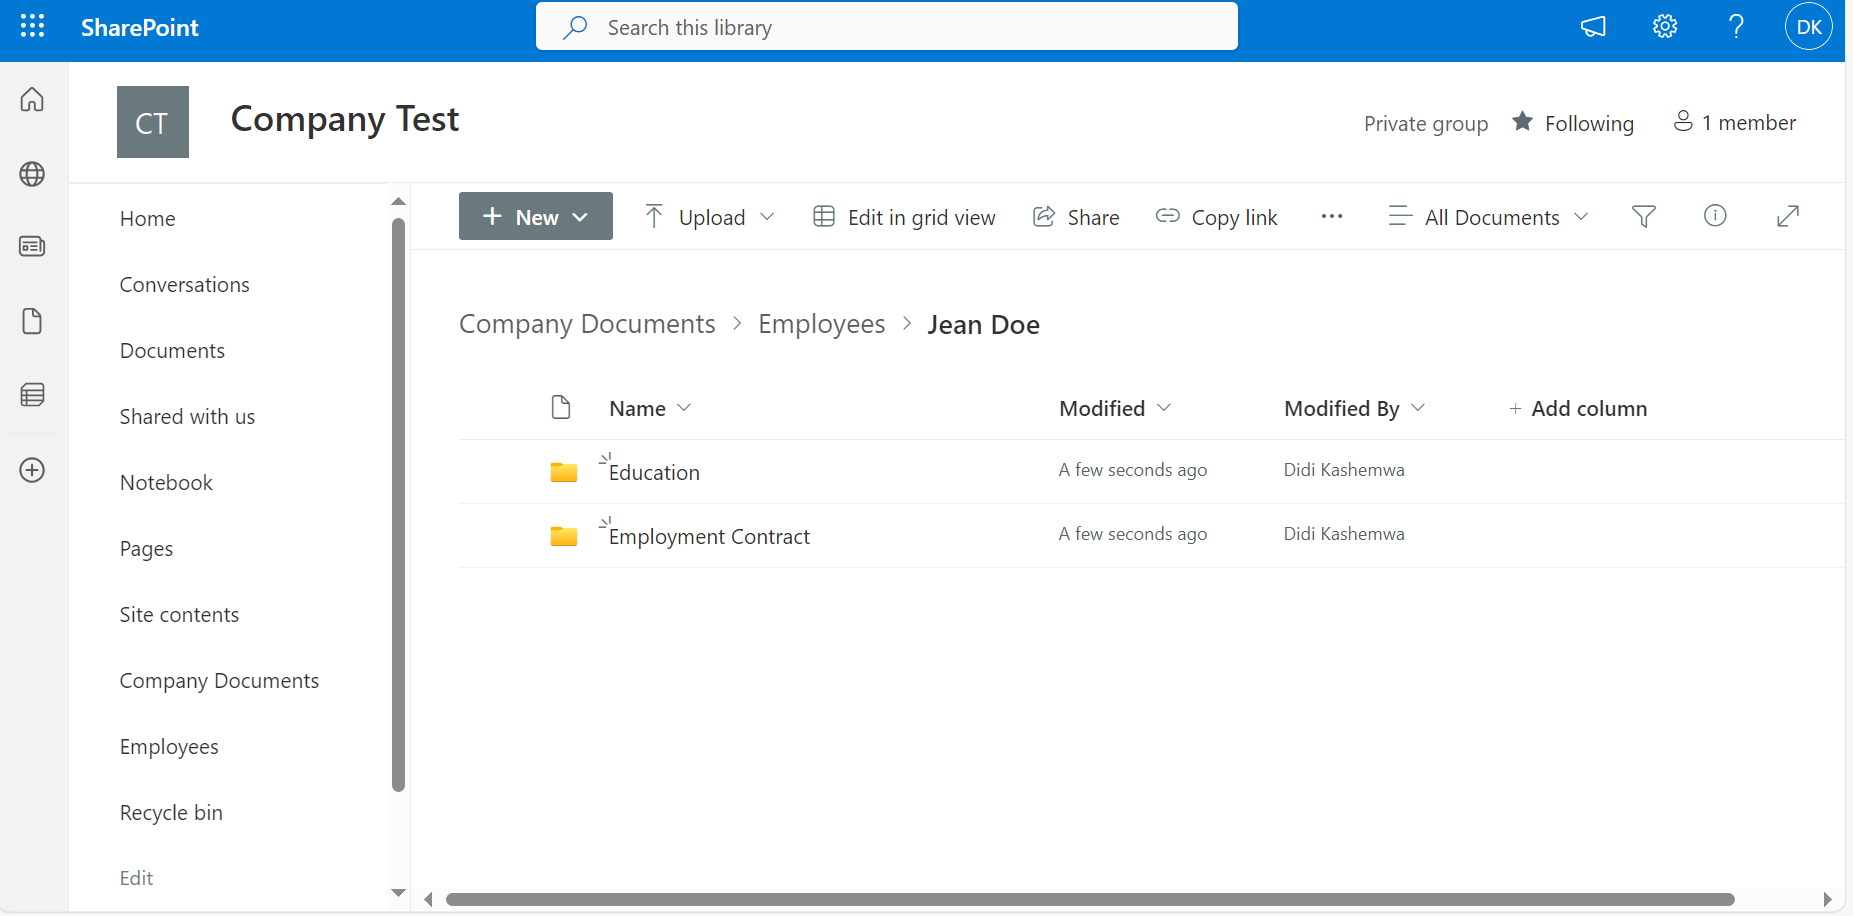
-